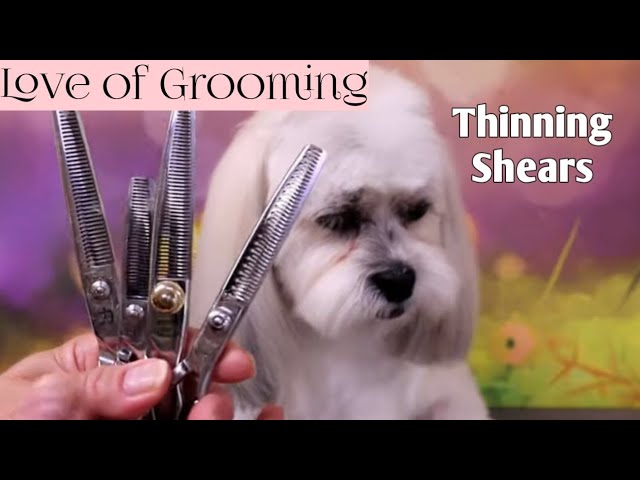
Thinning scissors help blend coat lines, remove bulk, and create a softer, natural finish on dogs.
If you’ve ever looked at a fluffy face, a bulky leg, or a choppy trim and thought, “This needs to look more natural,” thinning scissors are often the answer. Used the right way, thinning scissors on a dog can soften edges without making the coat look hacked or uneven. I’ve used them for years to clean up scissor work on everything from doodles to double-coated breeds, and the biggest lesson is simple: less is usually more.
What thinning scissors do on a dog
Thinning scissors, sometimes called blending shears or texturizing shears, are grooming tools with one toothed blade and one straight blade. They remove some hair while leaving the rest in place, which helps reduce bulk and soften lines. They are especially useful when you want a neat look without sharp clipper marks or blunt scissor edges.
When people ask how to use thinning scissors on a dog, they usually want one of three things:
• To blend a choppy trim
• To reduce thickness in heavy coat areas
• To make the finish look more natural
That’s exactly what thinning scissors are good at. They are not meant to replace all grooming tools, and they are not the best choice for every coat type or every body area.

When to use thinning scissors on a dog
Thinning scissors are best used when the coat is already reasonably clean, dry, and brushed out. They work well on feathering, leg fur, face areas, and places where you want shape without obvious lines. They are also useful for dogs with thick, wavy, or fluffy coats that can look bulky after clipping.
Good times to use thinning scissors include:
• Around the feet to soften the outline
• On the legs to blend uneven sections
• Around the ears for a more natural edge
• On the face to reduce bulk near the cheeks or muzzle
• On topknot areas when you want a softer finish
In my experience, thinning scissors work best as a finishing tool. If the coat is tangled or dirty, the scissors will snag and the cut will look messy. A clean coat always gives better results.
What you need before you start
Before you use thinning scissors on a dog, gather the right tools and set up a calm space. This makes the whole process safer and easier for both of you. A nervous dog can move suddenly, so good preparation matters more than speed.
You will need:
• Thinning scissors
• A slicker brush or comb
• A regular pair of grooming scissors
• A grooming table or stable surface
• Treats for positive reinforcement
• A towel or non-slip mat
Choose thinning scissors with a comfortable handle and a blade size that fits the dog’s coat and your hand. For small dogs or delicate areas, shorter scissors are easier to control. For larger dogs, a longer blade can help with smoother blending.
How to use thinning scissors on a dog step by step
Using thinning scissors well is about control, not force. Think of it like trimming a hedge with a soft touch instead of carving wood. You are shaping, not cutting big chunks out.
1. Brush the coat first
Always brush out knots, mats, and loose undercoat before you begin. Thinning scissors should never go into tangled hair because they can pull and create uneven results. A comb should glide through the coat before you make a single cut.
If the coat is really thick, I usually brush in sections. That helps me see where the coat is heavy and where it already lies naturally.
2. Hold the scissors correctly
Hold the scissors with your thumb and ring finger in the handles if you are right-handed, and keep your other fingers steady for balance. Use your free hand to lift or separate the coat. Good hand control is what keeps the cut soft instead of jagged.
Do not open the scissors too wide. Small, controlled snips give much better results.
3. Cut only small amounts at a time
This is the most important rule when learning how to use thinning scissors on a dog. Make short, light snips and check your work often. Thinning scissors can remove more hair than you expect, especially if you keep cutting in the same spot.
A safe approach is to:
• Snip once, then comb the area
• Step back and look at the shape
• Repeat only if needed
I once made the mistake of over-thinning a tail feather on a poodle mix, and it looked wispy for weeks. Since then, I always cut slowly and stop before the coat looks “done.”
4. Work with the coat direction
Follow the natural lay of the coat. Cutting against the growth pattern can make the finish look uneven or even create a patchy look. Use the scissors to blend where one section meets another, such as the neck into the shoulder or the leg into the paw.
For a smoother finish:
• Use the scissors at a slight angle
• Make light snips near the top layer
• Comb after every few cuts
The goal is to make the transition invisible. If you can spot the exact place you cut, you probably need to blend a little more.
5. Use them to soften edges, not erase shape
Thinning scissors are perfect for softening a line, but they should not remove all structure. For example, a tidy leg should still look like a leg. A face should still keep its breed style and balance. Over-thinning can make the dog look uneven or thin in a way that is hard to fix.
I like to think of it as fading a haircut. You want smooth edges, not a bald spot.
6. Check the finish from different angles
Move around the dog and look from the front, side, and top. Coat can look very different depending on the angle and the lighting. A section that seems fine up close may stand out once the dog moves.
If possible, comb the coat again and let it settle before deciding whether to trim more. That extra pause helps prevent overcutting.

Best areas to use thinning scissors on a dog
Some parts of the body respond better to thinning scissors than others. These are the most common and useful areas.
Face
The face often needs soft blending around the cheeks, jaw, and muzzle. Thinning scissors can help reduce bulk and make the face look rounder or cleaner without harsh lines. Be extra careful near the eyes, nose, and lips.
Ears
Ears can look heavy or uneven, especially on fluffy breeds. Thinning scissors can soften the edges and blend the ear into the head more naturally. Use gentle snips only, since ear skin can be delicate.
Legs and feathers
Legs often collect extra volume, especially on spaniels, doodles, and long-coated breeds. Thinning scissors help blend the leg shape so it looks neat but not boxy. They are also useful for feathering on the back legs and chest.
Feet
The area around the feet is one of the most common places to use thinning scissors on a dog. They can round off the outline and help the paws look tidy. This also helps reduce the “puffy slipper” look some dogs get after brushing.
Tail
Tails can be thick at the base and wispy at the end. Thinning scissors let you blend the shape so the tail looks balanced. Use a light hand and stop often, because tails can change appearance quickly.
Mistakes to avoid
When people first learn how to use thinning scissors on a dog, they often make the same few mistakes. Most of them are easy to avoid once you know what to watch for.
Common mistakes include:
• Using thinning scissors on tangled or matted fur
• Cutting too much in one spot
• Holding the scissors too close to the skin
• Using them to fix a bad clipper cut all at once
• Forgetting to comb and check the shape often
One of the biggest lessons I’ve learned is that thinning scissors can hide small mistakes, but they can also make big mistakes harder to repair. If you remove too much hair, you may need to wait for regrowth. That’s why a slow, careful pace matters so much.
Safety tips for using thinning scissors on a dog
Safety should always come first. Dogs shift, blink, scratch, and sometimes sneeze at the worst moment. A calm setup lowers the risk of accidents.
Keep these safety tips in mind:
• Keep the blades pointed away from the dog’s eyes and skin folds
• Never rush around sensitive areas
• Use only sharp, clean scissors
• Stop if the dog becomes stressed or fidgety
• Reward calm behavior with treats and praise
If your dog is anxious, take breaks. A short session is better than forcing a long one. Grooming should feel like a routine, not a battle.
Which dogs benefit most from thinning scissors
Not every dog needs thinning scissors, but many do benefit from them. Dogs with thick, wavy, curly, or feathered coats often look best when blended instead of clipped bluntly. Breeds and mixes like poodles, doodles, spaniels, shih tzus, and some terriers often need this kind of finish.
Thinning scissors are also helpful for:
• Dogs with a lot of bulk around the legs
• Dogs with head hair that looks too round or heavy
• Dogs with coat lines that need softening after clipping
• Pet trims where a natural look is preferred
That said, some coat types do better with other tools. Very fine coats, severely matted coats, or double coats that shed heavily may need different grooming methods. A groomer should always match the tool to the coat.
Thinning scissors vs other grooming tools
It helps to know how thinning scissors compare with other tools. Each one has its own job, and the best groomers use them together.
• Regular grooming scissors make clean, blunt cuts
• Thinning scissors soften and blend
• Chunkers remove more coat and create a more textured finish
• Clippers shorten the coat quickly and evenly
• Brushes and combs prepare the coat so tools work properly
If you want a polished pet trim, thinning scissors are often the finishing touch. They are not the fastest tool, but they are one of the best for refinement.
How often should you use thinning scissors on a dog
How often you use thinning scissors depends on the coat, the style, and how fast the dog’s hair grows. Some dogs need light blending every few weeks, while others only need a touch-up every grooming cycle. For many pets, using thinning scissors during regular grooming appointments is enough.
A good rule is to use them only when the coat starts to look bulky, uneven, or too sharp around the edges. If the dog still looks neat after brushing, you may not need them yet. Overuse can make the coat look thin or uneven.
Frequently Asked Questions
Can I use thinning scissors on my dog at home?
Yes, you can use thinning scissors at home if your dog is calm and the coat is clean and brushed. Start with small snips and work slowly, especially around the face and feet. If you are unsure, practice on low-risk areas first or ask a professional groomer for a quick demo.
Are thinning scissors safe for dogs?
Thinning scissors are safe when used correctly, but they can cause problems if you rush or cut too close to the skin. Keep the dog still, use light pressure, and avoid sensitive areas like the eyes and skin folds. Clean, well-maintained scissors also help reduce snagging.
What is the difference between thinning scissors and regular scissors?
Regular scissors cut all the hair they touch, which gives a blunt edge. Thinning scissors remove only some of the hair, which helps soften lines and blend the coat more naturally. That is why thinning scissors are often used for finishing work.
Can thinning scissors fix a bad haircut?
They can help blend uneven areas, but they cannot fix every mistake. If a section is cut too short or shaped badly, thinning scissors may only soften the look, not fully correct it. In those cases, it is usually better to wait for regrowth or get professional help.
How do I know if I’m overusing thinning scissors?
If the coat starts to look wispy, patchy, or see-through, you may have removed too much hair. Another sign is when the dog’s outline loses its shape instead of becoming softer. When in doubt, stop, brush the coat, and reassess before cutting again.
Conclusion
Learning how to use thinning scissors on a dog is really about patience, control, and a light hand. Used the right way, they can turn a rough trim into a soft, natural-looking finish that flatters your dog’s coat and shape. The key is to work slowly, brush first, cut in small amounts, and stop before the coat loses its balance.
If you remember only one thing, make it this: thinning scissors are for blending, not chasing perfection in one pass. Practice on easy areas, watch your angles, and let the coat guide your hand. If you found this guide helpful, keep exploring grooming tips, share your own experience, or leave a comment with your biggest thinning-shears question.