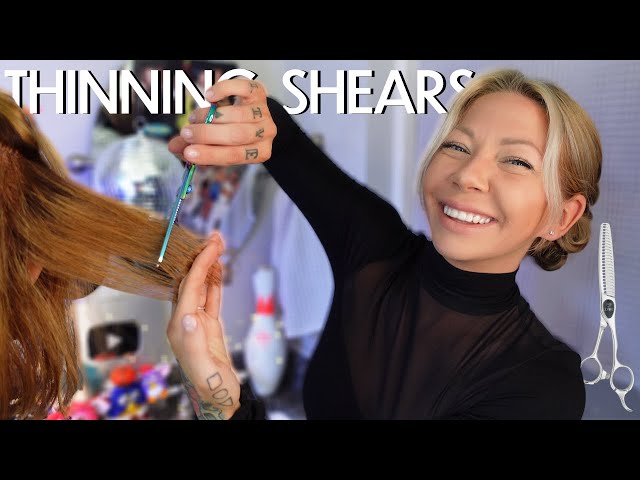
Thinning shears remove bulk and soften lines without taking away too much hair.
If you have ever wondered how to use thinning shears the right way, you are in the right place. I have spent years working with these tools in real salon settings, and I can tell you this: thinning shears are powerful, but only when you use them with control, purpose, and a light hand. Used well, they can turn heavy, uneven hair into something softer, lighter, and easier to shape.

What thinning shears are and why they matter
Thinning shears are special haircutting scissors with one straight blade and one notched blade. They do not cut every strand like regular shears do. Instead, they remove part of the hair in a section, which helps reduce bulk and blend harsh lines.
That makes thinning shears useful for thick hair, bulky ends, and hard-to-blend layers. They can also help a haircut move better and look more natural. But they are not a fix for every problem, and that is where many people go wrong.
I have seen beginner stylists use thinning shears like regular scissors, and the result is often choppy or frizzy ends. The tool is not the problem. The technique is.
How to use thinning shears step by step
Using thinning shears is less about speed and more about placement. The goal is to remove hair where it creates weight, not where it creates shape.
Follow these steps for better control:
Start with dry, clean hair
Dry hair shows texture, density, and the true shape of the haircut. Wet hair can hide mistakes and make you cut too much.Section the hair first
Divide the hair into manageable parts. This helps you work evenly and avoid over-thinning one area.Hold the thinning shears at a slight angle
Keep the blades moving cleanly through the hair. A small angle gives you more control and a softer result.Place the shears mid-length or near the ends
For most hair types, avoid cutting too close to the roots. Cutting near the scalp can leave obvious gaps and a rough finish.Close the shears once and check the result
One careful pass is often enough. You can always remove more hair, but you cannot put it back.Comb the hair and inspect the blend
Step back and look at how the section falls. If it still feels heavy, take a little more only where needed.
From experience, the best thinning work feels almost invisible. You should see the shape improve, but not see obvious holes or short chopped pieces.

Best places to use thinning shears on the hair
Knowing where to use thinning shears is just as important as knowing how to use thinning shears. The wrong placement can damage the haircut.
Good areas include:
• Thick ends that look bulky after a trim
• Heavy layers that do not blend well
• Wide sections in the sides or back of thick hair
• Areas that need softer movement and less weight
Areas to avoid or use very carefully:
• Very fine hair
• Curly hair that frizzes easily
• The roots of the hair
• Damaged hair that already has split or weak ends
I learned early on that curly hair needs extra caution. Thinning the wrong curl pattern can make the hair puff out instead of lie smoothly. For many curl types, point cutting or slide cutting may be a better choice than thinning shears.
How to use thinning shears on different hair types
Hair texture changes everything. The same tool can create a great result on one head and a bad result on another.
Thick hair
Thinning shears work very well on thick hair because they help reduce weight and make the hair easier to manage. Use them in small sections and focus on the areas that feel heavy.
Fine hair
Be careful with fine hair. Thinning shears can make it look thinner and more sparse if you remove too much. In many cases, a different cutting method is safer.
Curly hair
Curly hair needs a gentle touch. Thinning shears can create frizz or uneven puffing if used too close to the roots or too often. I usually recommend testing a very small section first.
Straight hair
Straight hair shows every line, so thinning shears must be used with precision. They can help remove bulk, but they can also leave visible marks if the placement is sloppy.
Wavy hair
Wavy hair often benefits from careful thinning at the ends or in heavy interior spots. The trick is to keep the natural wave pattern intact while removing extra bulk.
Common mistakes to avoid
A lot of people search for how to use thinning shears because they want a quicker, smoother haircut. That is fine, but the tool can backfire fast if you rush.
Here are the biggest mistakes I see:
• Cutting too close to the scalp, which can leave visible short pieces
• Overusing the shears in one section, which creates patchy results
• Using them on very fine or fragile hair without a clear reason
• Trying to fix a bad haircut by thinning it too much
• Closing the shears repeatedly in the same spot
One lesson I always share: thinning shears should support the haircut, not try to rescue it. If the shape is wrong, thinning will not magically fix it. Sometimes the best move is a better structural cut, not more thinning.
Benefits and limitations of thinning shears
Thinning shears can be a great tool, but they have limits. Knowing both sides helps you use them wisely.
Benefits:
• Reduce bulk in thick hair
• Soften blunt lines
• Improve blending between layers
• Make styles feel lighter and more movable
• Help hair lay better in some cuts
Limitations:
• Can make fine hair look thinner
• Can cause frizz in some curl patterns
• Do not fix poor haircut structure
• Can leave visible marks if overused
• Are not ideal for every area of the head
Industry guidance from professional cosmetology training often stresses control and moderation with texturizing tools. That matches what I have seen in practice too. Less is usually better.

How to care for thinning shears
A sharp, clean tool gives cleaner results. Dull shears can bend hair instead of cutting it, which makes the finish rough.
Take care of them by following these habits:
• Wipe the blades after each use
• Keep them dry to prevent rust
• Store them in a protective case
• Oil the pivot point when needed
• Have them sharpened by a professional
Good maintenance also helps with trust and safety. If the shears snag or tug, stop using them until they are checked. A smooth cut is not just about skill. It is also about tool quality.
Pro tips for better results
If you want to get better fast, focus on control, not force. That mindset changes everything.
Try these practical tips:
• Use thinning shears on small sections only
• Cut once, then review before cutting more
• Work from the middle of the hair down unless the style calls for something else
• Blend in stages instead of trying to remove too much at once
• Test on the least visible section first if you are unsure
A good mental image is to think of thinning shears like seasoning food. A little can improve everything. Too much can ruin the whole dish.
Frequently Asked Questions of How to use thinning shears
How often should I use thinning shears on hair?
Use them only when the hair truly needs bulk removal or softening. Overuse can weaken the shape and make the hair look uneven.
Can thinning shears damage hair?
They can cause problems if used too aggressively or on the wrong hair type. The main risk is not damage from the blade itself, but over-thinning and poor placement.
Are thinning shears good for curly hair?
Sometimes, but they must be used very carefully. Curly hair can frizz or expand if too much volume is removed in the wrong area.
Should thinning shears be used on wet or dry hair?
Dry hair is usually better because it shows the real texture and density. That makes it easier to avoid taking off too much.
Can I use thinning shears at home?
Yes, but only if you start with small sections and a light touch. If you are unsure, practice on less visible areas or ask a professional stylist first.
Conclusion
Learning how to use thinning shears well comes down to one rule: remove just enough, then stop. When you place them with care, they can soften heavy hair, improve movement, and make a haircut feel finished instead of bulky.
The best results come from patience, clean sections, and respect for the hair type in front of you. Start small, watch the shape closely, and let the haircut guide your hand. If this guide helped, explore more hair-cutting tips, keep practicing with purpose, and feel free to leave a comment with your own experience.